Card of the week 523
Instructions
 Step 1
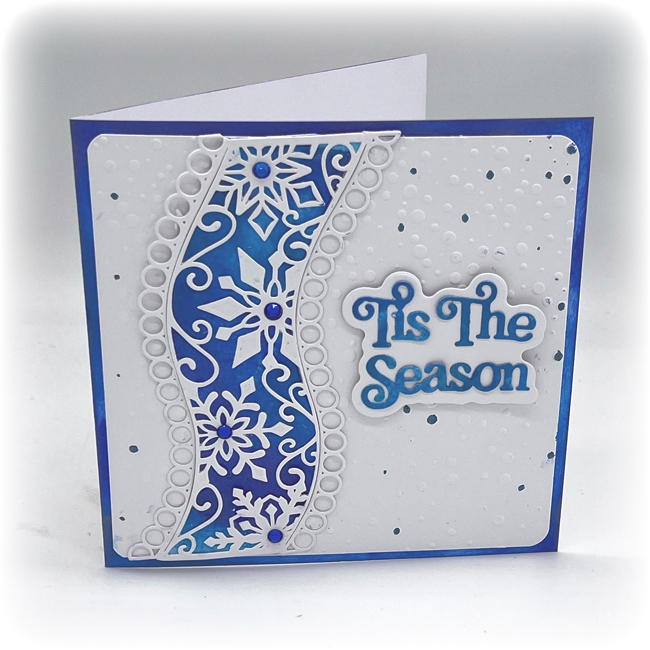
Ink the front of the card with the two colour blue inks
Step 2
Emboss a piece of white card and trim to 5 1/2″; round the corners using a corner rounder punch and adhere to the card blank
Step 3
Place all five dies from the snowflake ribbon wave die onto a piece of white card, pushing them up close together. Secure with low tack tape and run through the machine, this will give you a decorative wave.
Step 4
Take a piece of blue inked card to create a backing for the wave – lay the two plain wave dies onto the blue and place the white snowflake cut out wave over the top as a guide to see how wide you need to make it
Step 5
Adhere the wave to the left hand side of the card as picture
Step 6
Cut the greeting in blue and the shadow in white and add to the card with foam pads
Step 7
Finish with gems to the centre of the snowflakes and add a few dots of blue to the snowfall with a gel pen
Second Card
Step 1 
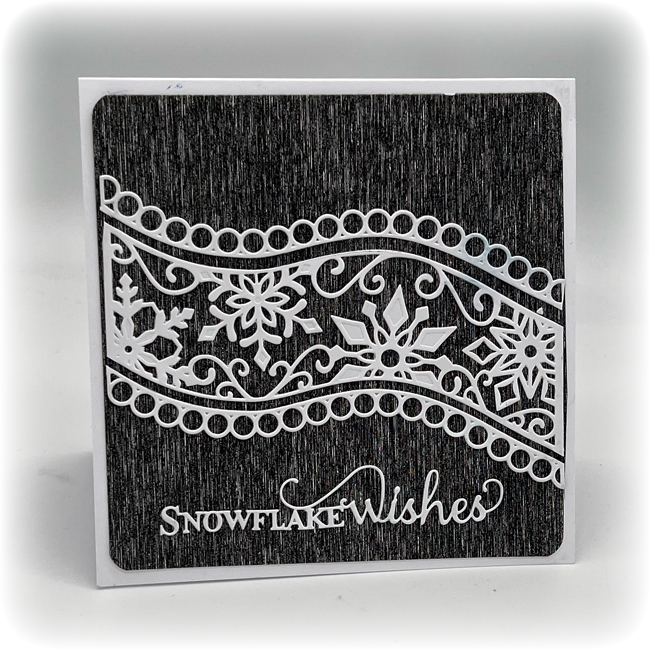
Cut a piece of black waterfall card to measure 5 1/2″ square; round the corners
Step 2
Cut the snowflake ribbon wave die using the decorative middle with the two plain cutting edges
Step 3
Cut the two loopy borders with the two plain cutting edges
Step 4
Adhere the three parts across the centre of the card spacing as desired
Step 5
Finish with a greeting
